If you encounter any issues or need assistance, please contact our support team at support@characterstrong.com.
Prerequisites
Before you begin, ensure the following prerequisites are met.
- Invite IT Department Staff: Ensure that your school’s IT department staff are invited to CharacterStrong by either an existing District Lead or a CharacterStrong staff member.
- Assign Security Manager Role: Assign the “Security Manager” role to the IT department staff to allow them to access and configure security settings. This can be done on the School Management > Members page or by a CharacterStrong staff member.
Security Options
CharacterStrong offers robust security options to ensure secure access.
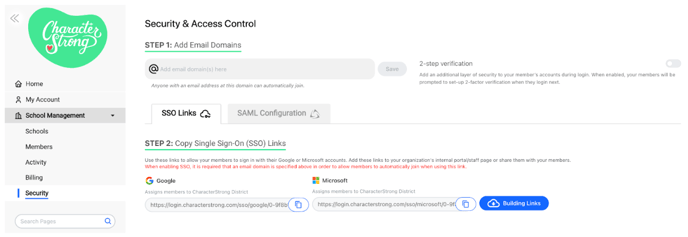
- STEP 1: Add Email Domains - Add email domains for your organization’s sign-ins.
- Navigate to School Management > Security.
- In STEP 1: Add Email Domains, enter the email domain(s) that members of your organization will use to sign in.
- Click Save to confirm the email domains.
- 2-Step Verification (MFA) - Enable MFA for username/password accounts to enhance security.
- MFA only applies to username/password accounts (not SSO or SAML).
- Members will be prompted to configure MFA with a password manager like 1Password, Google Authenticator, iCloud Password Manager, or any Time-based One-Time Password (TOTP) compliant tool when enabled.

Single Sign-On (SSO) Links
Configuring SSO Links
This guide will help you utilize SSO links for Google and Microsoft accounts, allowing members to be automatically assigned to a building after signing in with their managed accounts.
You may also integrate with Google and Microsoft AzureAD using SAML - see the next section for instructions.
- Navigate to Security & Access Control.
- From the CharacterStrong Curriculum, navigate to School Management > Security.
- Add Email Domains.
- In STEP 1: Add Email Domains, enter the email domains that members of your organization will use to sign in.
- Click Save after adding the domains.
- Get SSO Links.
- Select the SSO Links tab.
- For Districts: Download all links as CSV for each school in your district, if there are missing buildings, please reach out to info@characterstrong.com.
- Copy the SSO links provided for Google and Microsoft. These links are unique to each building
- and will be used to authenticate via Google or Microsoft accounts.
- Your Microsoft Azure Active Directory (AAD) might require our Client ID to be added to the allowed list. Please reach out to your IT department or Azure Administrator and provide them with the following information:
- Application Id: bdb25aa0-4a85-4c4f-95db-a4a129917ef6
- Client Id: 811552779698-s67of5hk662dj4c9b77l7n7auuo9c3u3.apps.googleusercontent.com
- Your Microsoft Azure Active Directory (AAD) might require our Client ID to be added to the allowed list. Please reach out to your IT department or Azure Administrator and provide them with the following information:
- Share SSO Links.
- Use these links to allow your members to sign in with their Google or Microsoft accounts. After signing in with the SSO provider, members will be assigned/moved automatically to the specific building link.
- These links can be added to your organization’s internal portal, or staff page, or shared directly with members.
- Ensure that at least 1 email domain is specified above to allow members to automatically join when using these links.
SSO Link Notes
2-Step Verification:
- 2-Step MFA will be bypassed for SSO Links
Allowed Domains:
- If no domain is set, members will require manual approval from the School Management > Members > Invites Tab from a building admin before they can access any content.
Please reach out to info@characterstrong.com if you encounter any issues.
SAML
Introduction
Security Assertion Markup Language (SAML) facilitates secure, standardized authentication between an identity provider (such as a school district's SAML-compliant IDP) and CharacterStrong. Activating SAML redirects members to your Single Sign-On provider for login, ensuring secure authentication and allowing you to manage user attributes, such as roles and locations, effectively.
Configuring SAML
First, ensure the Prerequisites defined above are met. Then, follow the step-by-step guide below to configure SAML enabling your staff to sign in seamlessly federated by your internal Identity Provider.
Step 1: Navigate to SAML Configuration
From the School Management > Security page, navigate to the SAML Configuration tab.
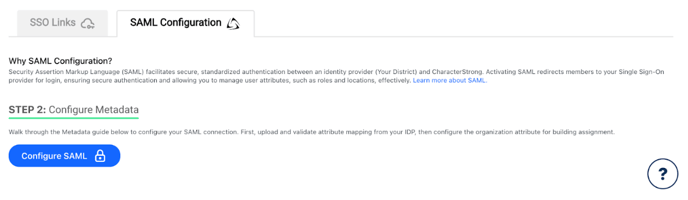
Step 2: Configure Metadata
Click on Configure SAML to start the metadata configuration. A modal guide will walk you through the following steps:
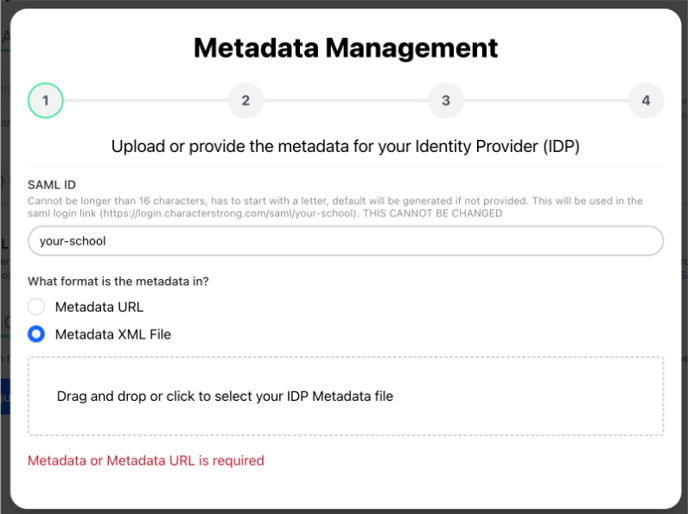
Metadata Step 1: Upload Metadata
- Set a SAML ID (optional)
- It must be a unique identifier for your school district, once set this cannot be changed.
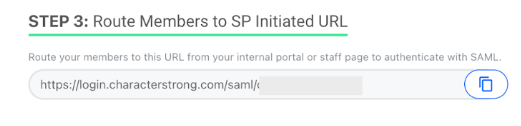
- This ID will be used for the SP Initiated URL: https://login.characterstrong.com/saml/saml-id
- A unique identifier will be created if left blank.
- Upload or provide the metadata for your Identity Provider (IDP)
- Select the format of your metadata: Metadata URL or Metadata XML File.
- Provide the Metadata URL or upload the XML file.
- Click “Next” to validate your metadata

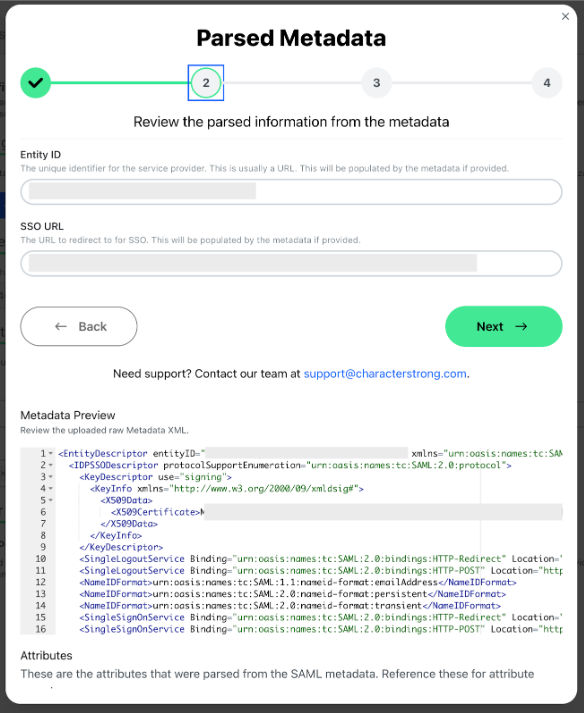
Metadata Step 2: Validate Parsed Fields
Review the parsed information from the metadata
- Verify the Entity ID and SSO URL.
- Review the Metadata Preview to ensure all information is correctly parsed.
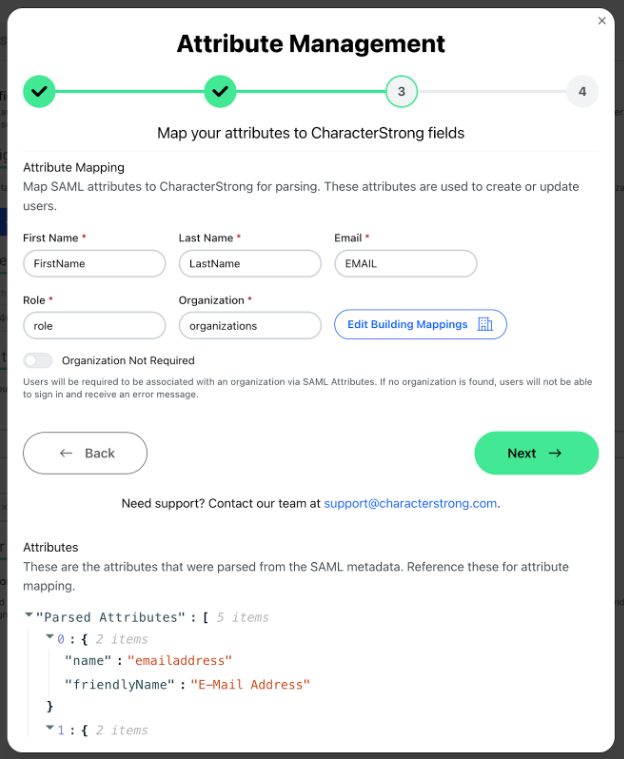
Metadata Step 3: Map Attributes
Map your attributes to CharacterStrong fields
- Enter the attribute names that match the corresponding CharacterStrong user fields. These attributes are used to create or update users during the login process.
- Required fields: First Name, Last Name, Email, Role, Organization.
- Reference the parsed Metadata Attributes at the bottom of the window if applicable.
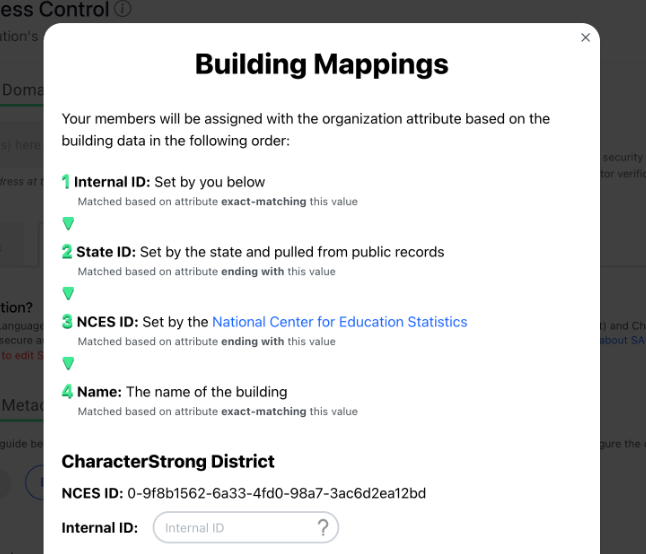
Configure Building mappings to map internal building IDs to CharacterStrong organizations automatically.
Members will be associated with the building that matches the “Organization” attribute using the following order:
1. Internal ID: Set by you in the Building Mappings dialog
Matched based on attribute exact-matching this value
2. State ID: Set by the state and pulled from public records
Matched based on attribute ending with this value
3. NCES ID: Set by the National Center for Education Statistics
Matched based on attribute ending with this value
4. Name: The name of the building
Matched based on attribute exact-matching this value
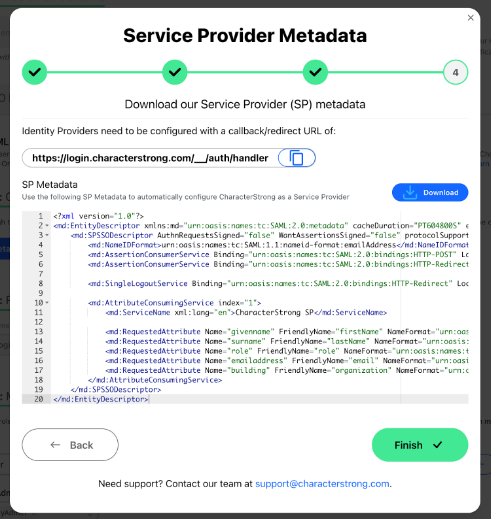
Metadata Step 4: Service Provider Metadata
Configure CharacterStrong as a Service Provider
- Identity Providers need to be configured with a callback/redirect URL: https://login.characterstrong.com/__/auth/handler
- Or download the SP Metadata to automatically configure CharacterStrong as a Service Provider.
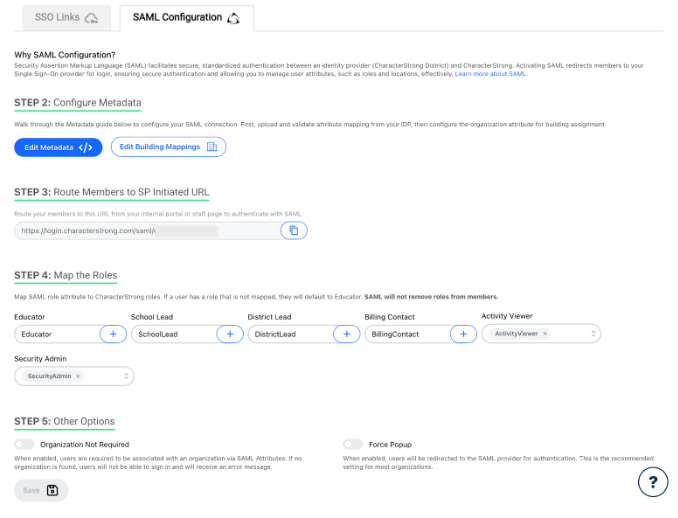
Step 3: Route Members to SP Initiated URL
To authenticate with SAML, provide the URL to route your members from your internal portal or staff page.
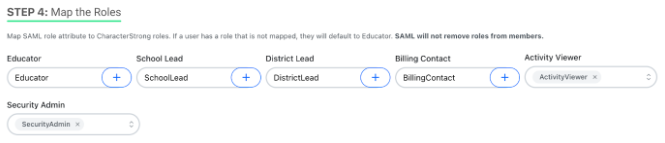
Step 4: Map the Roles
Map the SAML role attribute to CharacterStrong roles. If a user has a role that is not mapped, they will default to Educator. SAML will not remove roles from members.
Step 5: Other Options
- Organization Not Required: When enabled users will be assigned to the District level if no building is found. Otherwise, they will receive an error message and be prevented from logging into the curriculum.
- Force Popup: Not recommended, to use popups for SAML instead of redirecting the browser.